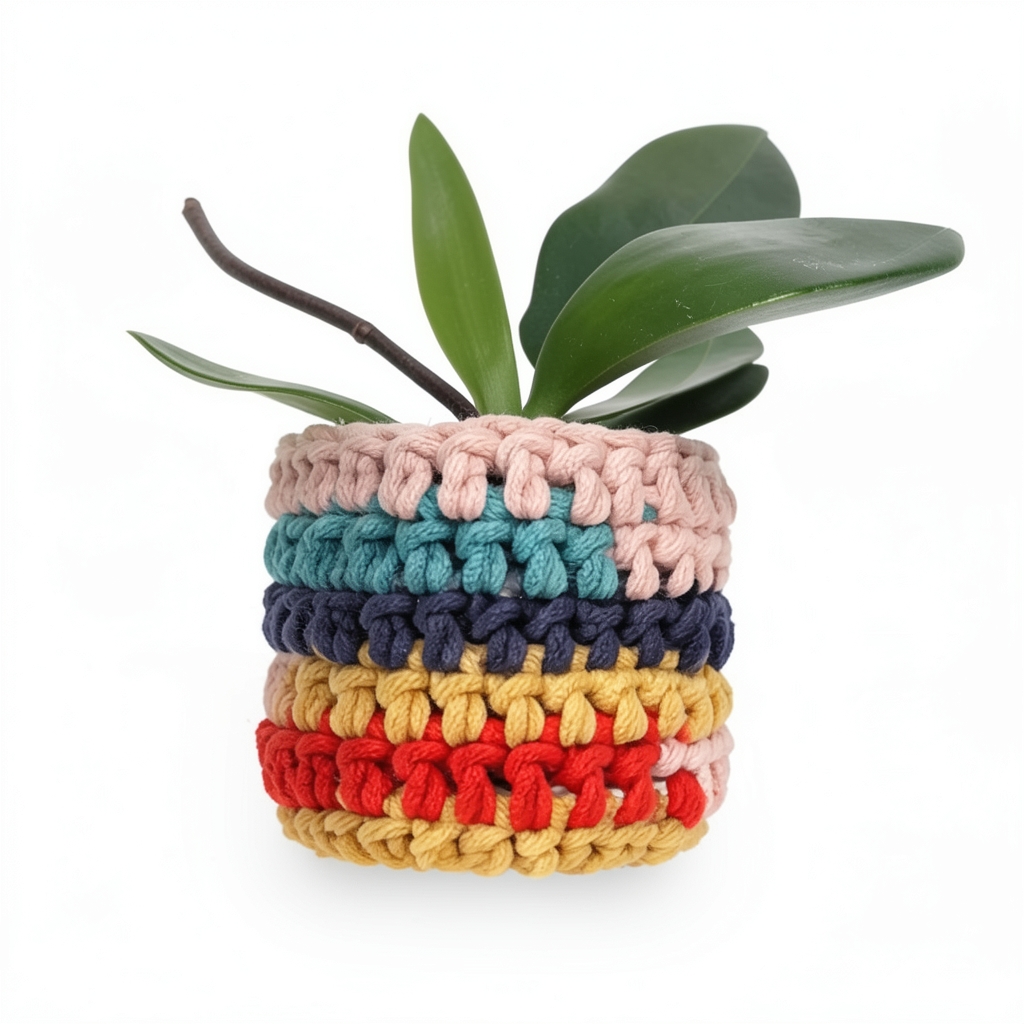
The planter cover that makes you want to buy more plants. Colorful, easy to crochet and endlessly customizable depending on the colors you have on hand 🪴
- Level
- Beginner
- Time
- 1 to 2 hours
Materials
Cotton yarn in multiple colors, or leftover balls of 5mm yarn 10 mm crochet hook Yarn needle Pair of scissors And a tape measure
Step 1 : The basics
-> To know before starting: This pot cover is worked in closed rounds. Each round starts with 3 chain stitches, which do not count as a double crochet and are used only to give height, and ends with 1 slip stitch in the first double crochet of the round. The first double crochet of a new round is inserted into the same stitch as the slip stitch that just closed the previous round. This is the point where you can easily lose a stitch without noticing: if your count doesn't add up, it's almost always there that you need to look. Closing the rounds creates a small vertical line visible on the side of the pot cover. This is normal and specific to this method: just think to place it at the back when you put your pot.
Row 1
Start with a magic ring. Make 3 chains for the height, then 8 double crochet stitches in the ring. Pull the yarn to close the ring, then close the round with 1 slip stitch in the first double crochet. (8 double crochet)
Row 2
3 chain stitches, then 1 increase in each stitch, that is 2 double crochet in the same stitch, repeated 8 times. Close with 1 slip stitch in the first double crochet. (16 double crochet)
-> Adjust the size of the base: If your pot is more than 9 cm in diameter, just keep increasing by offsetting the increases by one row at a time. The principle remains the same: add 8 stitches per row, spacing them further and further apart.
Row 3
alternate 1 double crochet, 1 increase. Repeat 8 times. (24 double crochet)
Row 4
alternate 2 double crochet, 1 increase. Repeat 8 times. (32 double crochet)
Row 5
alternate 3 double crochet, 1 increase. Repeat 8 times. (40 double crochet)
And so on: with each new row, you add a single crochet before the increase. This offset prevents the increases from overlapping and creating angles, the bottom stays nicely round instead of forming an octagon. Stop increasing as soon as your disk reaches the diameter of the base of your pot, by placing it on top to check.
Step 2 : The shape
Row 3
Working only in the back loop, alternate 1 double crochet, 1 increase. Repeat 8 times. (24 double crochet)
-> Working this row in a single strand creates a small ridge all around the base. It's this ridge that makes the disk "bend" and straightens the sides upwards, instead of letting them flare out.
Row 4
1 double crochet in each stitch all around, no increases. (24 double crochet per row)
Repeat this row as many times as needed until you reach the desired height. You can change colors with each row, as you like.
Step 3 : Changing Colors
You can change colors wherever you want, not necessarily at the end of a row. What matters is the moment: the change always happens on the last yarn over of the last double crochet of the old color. Crochet this double crochet normally until the last two loops on the hook, then bring the new color to close them. The remaining loop is already in the new shade: the next stitch starts directly in the right color, with no visible shift. Cut the old yarn leaving about ten centimeters, then weave in the ends with a yarn needle on the inside of the pot cover. It's up to you to choose the effect: a change in the middle of a row gives a freer look, patchwork-style, while a change at the end of a row gives neat and regular stripes. Both work very well, it's just a matter of style.
Step 4 : Finishing
Finish with 1 slip stitch, cut the yarn leaving about 10 cm, then weave in all ends with the yarn needle.