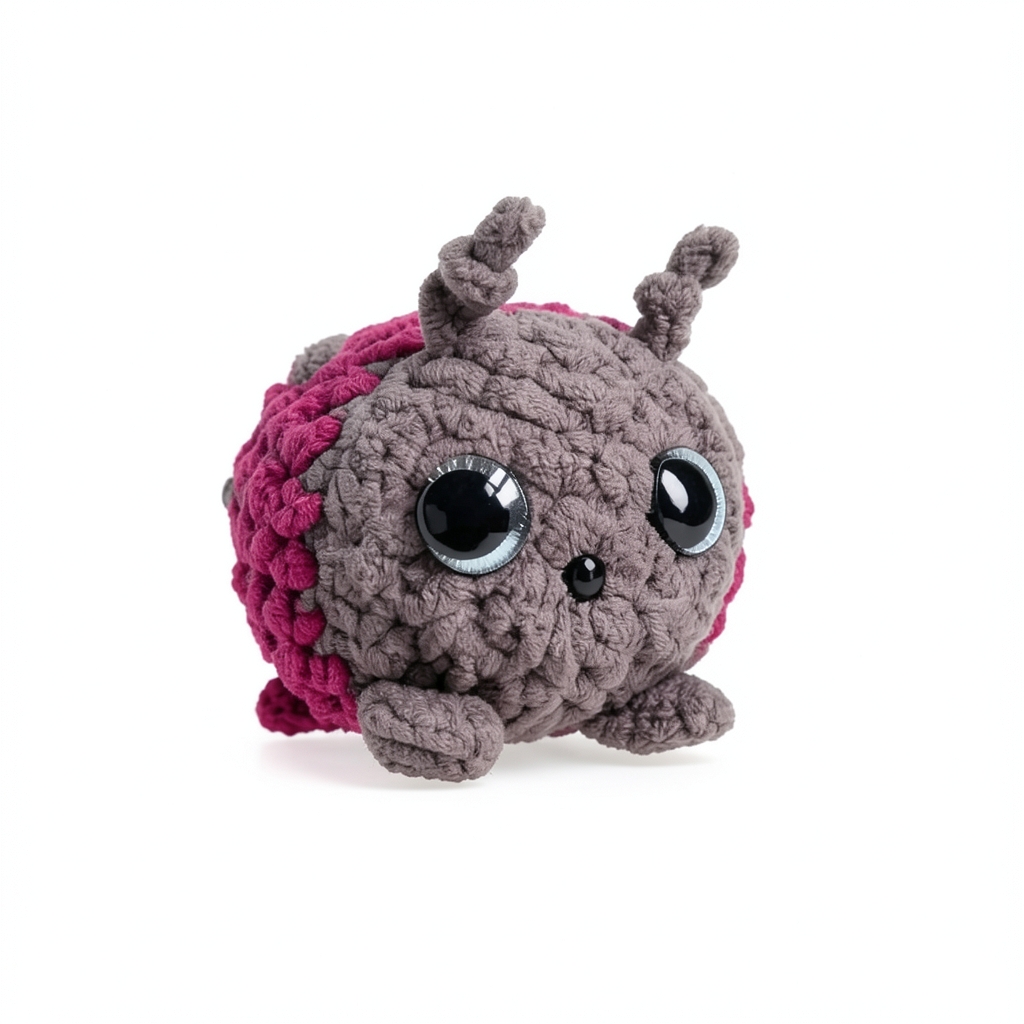
Fall in love with this tiny, soft ladybug. It's crocheted in an evening and can be placed anywhere: desk, shelf, bag, or keychain 🐞🍀
- Level
- Beginner
- Time
- 2 to 4 hours
Materials
Gray and purple chenille yarn 8mm crochet hook Stuffing Yarn needle 2 sizes of safety eyes Stitch marker (recommended)
Step 1 : The body
-> Gray yarn
Row 1
start with a magic ring and crochet 6 single crochet stitches. Pull the yarn to close the ring, then place a marker in the first stitch -> work in a spiral, without a slip stitch or chain stitch between rounds. (6 stitches)
Row 2
1 increase in each stitch, so 2 single crochet in the same stitch, repeated 6 times. The number of stitches doubles. (12 stitches)
Row 3
alternate 1 single crochet in the next stitch, then 1 increase in the following one. Repeat this sequence 6 times. (18 stitches)
Row 4
2 single crochet, then 1 increase. Repeat this sequence 6 times. -> The disk should remain flat at this stage. (24 stitches)
Color change: switch to purple. Finish the last stitch of row 4 by pulling the purple yarn for the last pull-through, then cut the yarn of the first color, leaving a tail to weave in. The transition will be clean, with no visible offset.
Row 5
1 single crochet in each stitch, inserting your hook only in the back loop (the loop farthest from you when you hold the work facing you). This row creates a small ridge all around, which adds texture and makes the sides stand out neatly. (24 stitches)
Rows 6 to 8
1 single crochet in each stitch, over 3 complete rows, without increasing or decreasing. (24 stitches per row)
At the end of row 8: attach the safety eyes and the nose while the opening is still wide, then place the antennae. Start stuffing afterward. The antennae: - Cut a length of yarn and thread it onto the yarn needle. - Poke the needle from the inside of the head and bring it out at the location of the first antenna. -Pull the yarn to form a loop of the desired height, then tie a knot at its base to secure it. Repeat on the other side, checking that both antennae are at the same height and well symmetrical. -Tuck the yarn ends inside and close with a hidden knot under the surface.
Row 9
2 single crochet, then 1 decrease (2 stitches crocheted together). Repeat 6 times. (18 stitches)
Row 10
alternate 1 single crochet, then 1 decrease. Repeat 6 times. Complete the stuffing before the opening becomes too small. (12 stitches)
Row 11
1 decrease × 6. (6 single crochet)
Finish: cut the yarn leaving a comfortable length. With the yarn needle, insert the yarn into the front loop of the 6 remaining stitches, all around, then gently pull to close. Tuck the yarn inside and cut flush.
Step 2 : 2 Gray Legs and 2 Purple Legs
Chain 2 stitches. Leave a small tail of yarn at the beginning, it will be useful at the end. Insert the hook into the first chain stitch, the one farthest from the hook, and make 1 half double crochet. The leg is summarized by this single point: it forms a small compact relief, just enough to suggest a leg without volume. Pull the yarn through the last loop to secure the stitch, then tie together the starting yarn and the ending yarn. This knot keeps the leg closed and prevents it from coming undone when sewing. Cut the yarn leaving enough length for sewing. Repeat the operation 3 more times, to obtain 2 gray legs and 2 purple legs. Sewing the legs: - Pin the 4 legs under the body, two on each side, checking that they are at the same height before securing anything. - Sew each leg with the yarn left in reserve: a few tight stitches at the base, alternating between the leg and the body. - Then pull out the two yarns in the same place, tie them together, then reinsert through the body and pull the needle out a bit further. Pull slightly to tuck the knot inside, then cut flush.
Step 3 : The Embroidery
Cut a good length of gray thread and thread it onto the yarn needle. Poke at the top of the ladybug, just behind the head, and come out at the bottom of the body to form the center line. Don't pull too tight, or the body will cave in. Then poke on either side of the center line to create the stitches: make a knot, re-poke into the stitch you just made, and come out at the location of the next one. Repeat until you have the desired number of stitches, alternating from one side to the other to keep the balance. Tuck the thread inside and secure it with a hidden knot underneath.