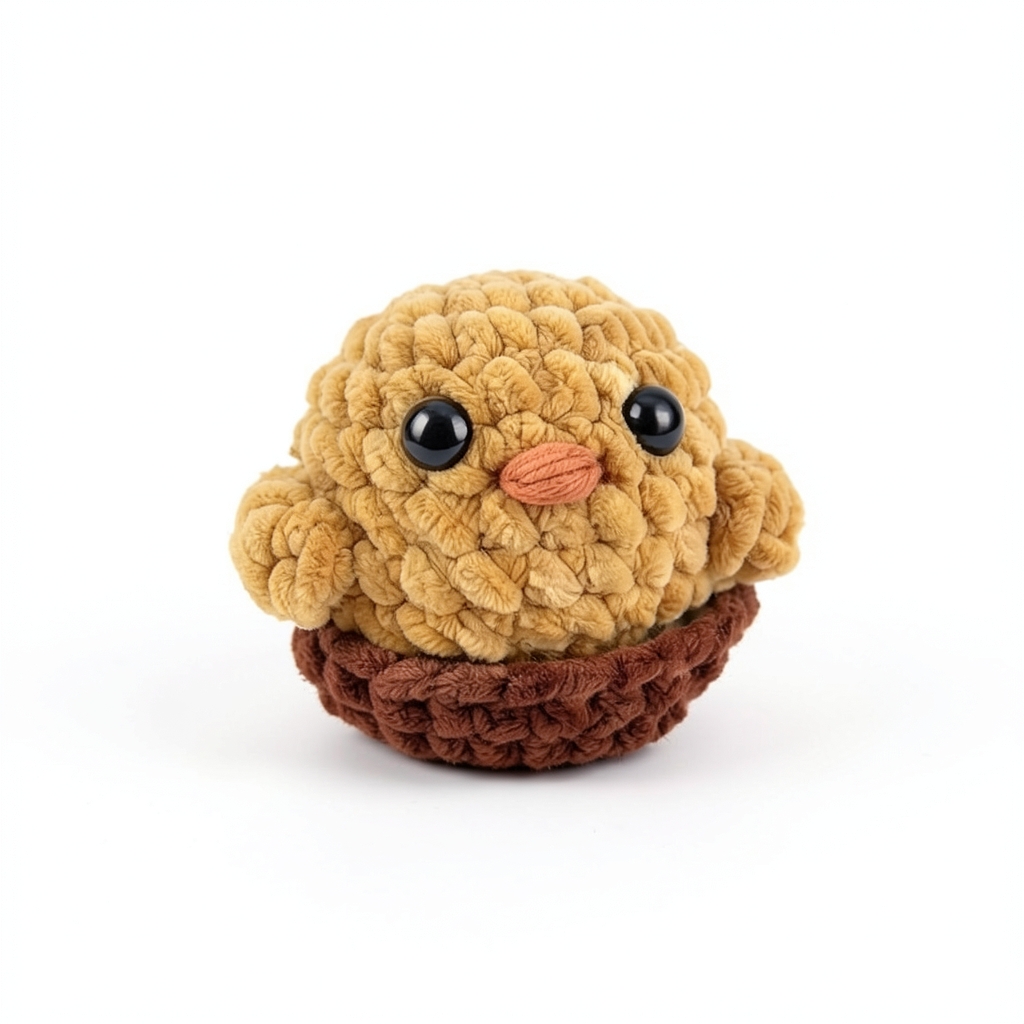
The perfect little chick to get started: simple, fast and super cute.
- Level
- Beginner
- Time
- 1 to 2 hours
Materials
Brown and yellow chenille yarn Orange cotton yarn 6mm crochet hook Stuffing Yarn needle Safety eyes Stitch marker (recommended)
Step 1 : Chick's Body
Row 1
start with a magic ring and crochet 8 single crochet stitches. Pull the yarn to close the ring, then place a marker in the first stitch -> work in a spiral, without a slip stitch or chain stitch between rounds. (8 stitches)
Row 2
1 increase in each stitch, so 2 single crochet in the same stitch, repeated 8 times. The number of stitches doubles. (16 stitches)
Row 3
alternate 1 single crochet in the next stitch, then 1 increase in the following one. Repeat this sequence 8 times. (24 stitches)
Rows 4 to 8
1 single crochet in each stitch, for 5 complete rows, without increasing or decreasing. -> This is where the chick's body forms. (24 stitches per row)
At the end of row 8: attach the safety eyes while the opening is still wide, spacing them 3 to 4 stitches apart and placing them towards the middle of the height. Then start stuffing.
Row 9
alternate 1 single crochet, then 1 decrease (2 stitches crocheted together). Repeat 8 times. (16 stitches)
Row 10
1 decrease × 8, so one decrease in each pair of stitches. Finish stuffing before the opening becomes too small -> this is the last moment to adjust the shape and fill the bottom of the body well. (8 stitches)
Row 11
1 single crochet in each stitch. (8 stitches)
Finishing: cut the yarn leaving a comfortable length. With the yarn needle, pass the yarn through the front loop of the remaining 8 stitches, all around, then gently pull to close the opening. Tuck the yarn inside the body and cut.
Step 2 : The wings x2
Start with a magic ring. All the stitches in this round are worked inside the ring, next to each other.
Step 1
2 chain stitches. -> They serve as the first stitch and give the starting height.
Step 2
1 double crochet in the magic ring.
Step 3
1 double crochet in the magic ring. -> That's the tallest stitch, it forms the tip of the wing.
Step 4
1 double crochet in the magic ring.
Step 5
1 single crochet in the magic ring. -> The height goes down and the wing takes the shape of a small petal.
Finish: Pull on the starting yarn to tighten the magic ring. Cut the yarn leaving enough length for sewing. Sew the wings: - pin the two wings checking for symmetry - thread the yarn left on the tapestry needle. Insert into the body at the marked spot, then pull out taking one stitch from the right edge of the wing. Reinsert into the body right next to it, skip one stitch, and continue along the base of the wing, one stitch in the body, one stitch in the wing, alternating. - reinsert the needle through the body and pull out far from the seam. Gently pull to hide the knot inside, then cut the yarn - repeat for the second wing, checking that it is at the same height as the first one.
Step 3 : The Shell x2
Row 1
start with a magic ring and crochet 8 single crochet stitches. Pull the yarn to close the ring, then place a marker in the first stitch. (8 stitches)
Row 2
1 increase in every stitch, so 2 single crochet in the same stitch, repeated 8 times. The number of stitches doubles. (16 stitches)
Row 3
alternate 1 single crochet in the next stitch, then 1 increase in the following one. Repeat this sequence 8 times. The disk should remain flat at this stage. (24 stitches)
Rows 4 and 5
1 single crochet in each stitch, for 2 full rows, without increasing or decreasing. The edges curl up and form a small cup. (24 stitches per row)
Finish: Make 1 slip stitch in the first stitch of the row to even out the edge, then cut the yarn and weave it in with the yarn needle. Repeat the step to have two shells.
Step 4 : The Beak
- Cut a 20 cm length of thread. - Insert the needle under the left eye and bring it out at the center of the face, where the beak will be. - Make a short horizontal stitch, then pass through the same spot several times to thicken the embroidery and form a small oval beak. - Reinsert the needle into the same starting hole under the eye, tie a knot at the back, and cut the thread.