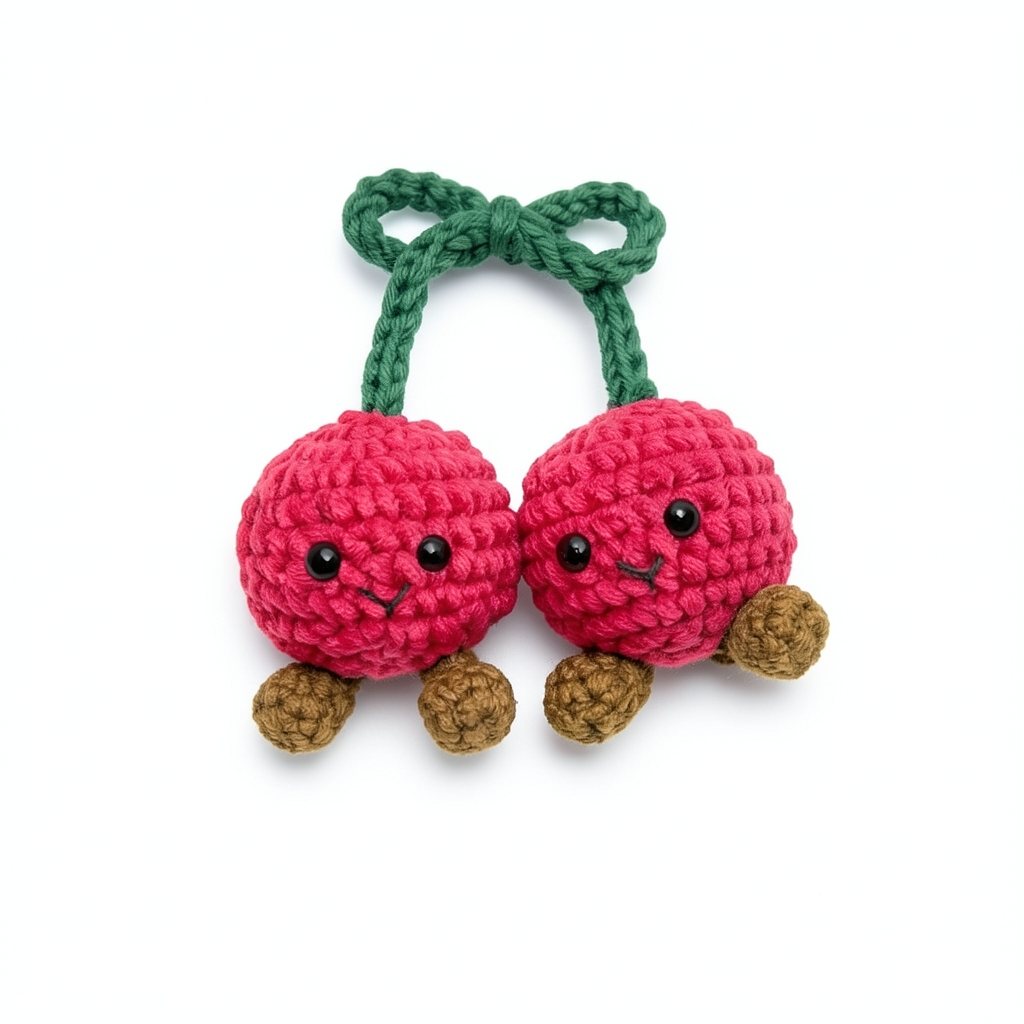
You can't resist these little cherries and their stem shaped like a knot. Chenille yarn for a super soft effect, cotton for a crisper look: it's up to you 🍒
- Level
- Beginner
- Time
- 2 to 4 hours
Materials
3 mm crochet hook Yarn suitable for 3 mm crochet hook, in three colors: red, green, and brown Yarn needle Stitch marker Safety eyes Stuffing
Step 1 : The stem
Row 1
Make a chain of 50 chain stitches. -> Leave a length of yarn at the beginning to be able to sew the stem to the cherry later.
Row 2
return to the foundation chain and make 1 slip stitch in each stitch, for a total of 50 slip stitches.
-> Finishing: cut the yarn, weave in the ends, then tie the stem onto itself in the middle to form the knot. Sew each end to the top of a cherry with the yarn needle.
Step 2 : Cherries x2
Row 1
start with a magic ring and crochet 10 single crochet stitches. Pull the yarn to close the ring, then place a marker in the first stitch -> we work in a spiral, without a slip stitch or chain stitch between rounds, so the marker is essential to not get lost. (10 stitches)
Row 2
1 increase in each stitch, so 2 single crochet in the same stitch, repeated 10 times. The number of stitches doubles. (20 stitches)
Row 3
alternate 1 single crochet in the next stitch, then 1 increase in the following one. Repeat this sequence 10 times. (30 stitches)
Rows 4 to 9
1 single crochet in each stitch, for 6 complete rows, without increasing or decreasing. -> This is where the cherry body forms. (30 stitches per row)
Row 10
Alternate 1 single crochet, then 1 decrease (2 stitches crocheted together). Repeat 10 times. -> Now is the time to attach the safety eyes while the opening is still wide, and to start stuffing. (20 stitches)
Row 11
1 decrease × 10, so one decrease in every pair of stitches. -> Finish the stuffing before the hole becomes too small. (10 stitches)
Row 12
1 decrease × 5. (5 single crochet)
-> Finishing: cut the yarn leaving a comfortable length, then with the yarn needle, pass the yarn through the front loop of the 5 remaining stitches and pull to close. Hide the yarn inside the cherry. Do the same for the second cherry, then sew the stem.
Step 3 : The legs x4
Row 1
start with a magic ring and crochet 6 single crochet stitches. Pull the yarn to close the ring, then place a marker in the first stitch. (6 stitches)
Row 2
1 increase in every stitch, so 2 single crochet in the same stitch, repeated 6 times. The number of stitches doubles. (12 stitches)
Row 3
alternate 1 single crochet in the next stitch, then 1 decrease (2 stitches crocheted together) over the following 2 stitches. Repeat this sequence 4 times. -> The piece starts to close up and form a small cup. (8 stitches)
Row 4
1 single crochet in each stitch, without increasing or decreasing. -> This row gives a bit of height. (8 stitches)
Row 5
1 decrease all along, so 4 successive decreases. (4 single crochet)
-> Finishing: cut the yarn leaving a good length for sewing. Do not stuff, the piece is small enough to stand on its own, and stuffing would deform it. Hide the starting yarn inside, then keep the ending yarn for sewing. Repeat these steps to get 4 pieces in total, 2 per cherry. Assembly: Pin them first to check the placement and symmetry before sewing, it's easier to adjust now than later. Then sew each piece with the yarn needle and the yarn left on hold: pass the needle alternately through a stitch on the edge of the piece, then through a stitch on the cherry, all around the base. Bring out the two yarns at the same place, make a knot, then hide the ends inside the cherry to conceal them.
Step 4 : The Smile
Thread a length of brown or black yarn onto the yarn needle, without tying a knot. Leave a bit of yarn inside the cherry, it will be useful at the end. - Locate the smile's position, just below the eyes and centered between them. - Insert the needle from the back of the cherry and bring it out next to the first eye, slightly below. - Reinsert at the same height under the second eye, on the other side. Do not pull all the way: leave the yarn a bit loose, it will form the curve. - Bring the needle out at the center, a bit lower, then pass over the taut strand to hold it down. This stitch gives the mouth its round shape. - Reinsert right next to it and bring it out near the starting point, very close to the waiting yarn. - Tie the two yarns together, then reinsert through the cherry and cut flush to hide the knot inside.